In this tutorial, we’re going to teach you about arbitrage trading, a feature only available to our Pro users.
First of all, what is arbitrage trading?
Arbitrage is the simultaneous purchase and sale of an asset to profit from a discrepancy in the price. It is a trade that exploits the price differences of identical or similar financial instruments on different markets or in different forms. Arbitrage exists as a result of market inefficiencies.
Normally, you would place arbitrage trades between exchanges. However, this is not possible, yet. Arbitrage will yield the successful results on exchanges with a lot of currencies, such as Poloniex or Bittrex.
Please note: The risk related to arbitrage is that a trade may not be fulfilled. When this happens, you will be left with the position of the currency your Hopper tried the arbitrage with.
Let’s configure arbitrage.

Configuration
First, navigate to your configuration.
Strategy
Firstly, you should decide if you want your Hopper to trade in conjunction with your strategy.
If so, you can keep your existing strategy open. If not, select “No Strategy”.
Arbitrage
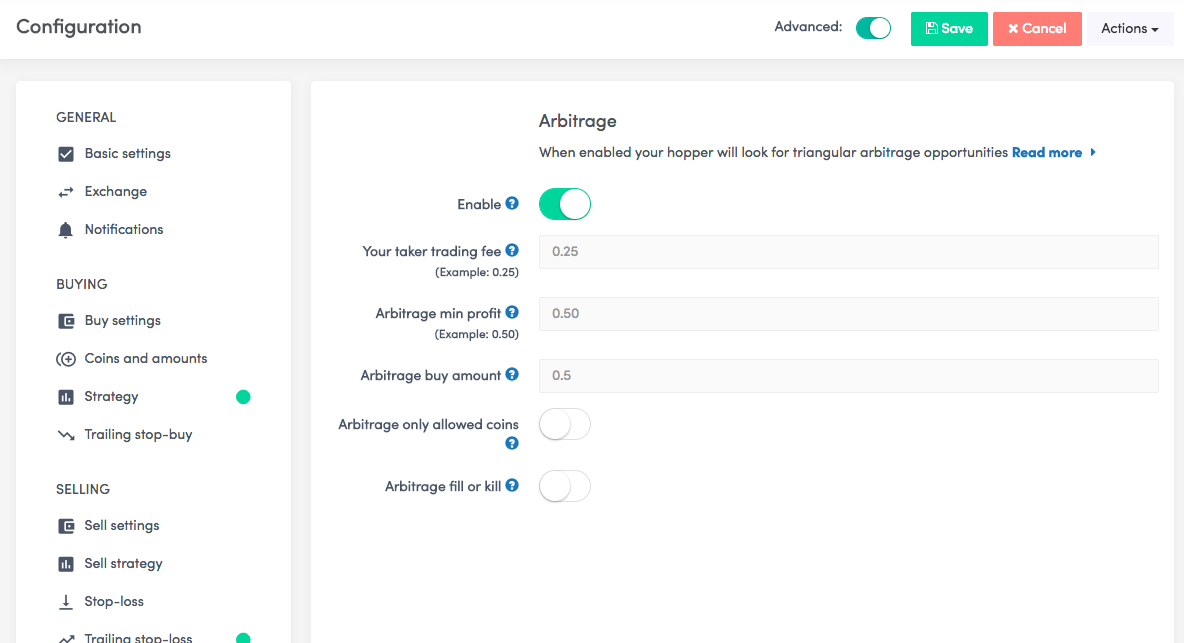
Enable arbitrage in your general configuration.
Taker fee
Fill in the fee of your exchange to allow your Hopper to calculate if the arbitrage would be profitable.
Minimum profit
Fill in a minimum profit you want to make of each arbitrage cycle. This should be higher than the taker fee.
Arbitrage only allowed coins
Because there’s a risk of getting stuck with currencies you don’t want, you can select this option.
With “Arbitrage only allowed coins” your Hopper will look for arbitrage trades with your selected coins. Yet, this will diminish your possibility of successfully executing arbitrage.
Tip: Enable "Arbitrage fill or kill". If enabled, the bot place orders that fail if they cannot be filled immediately. If disabled, the hopper will place normal limit orders.
That is it! The hopper is ready for arbitrage trading!

